
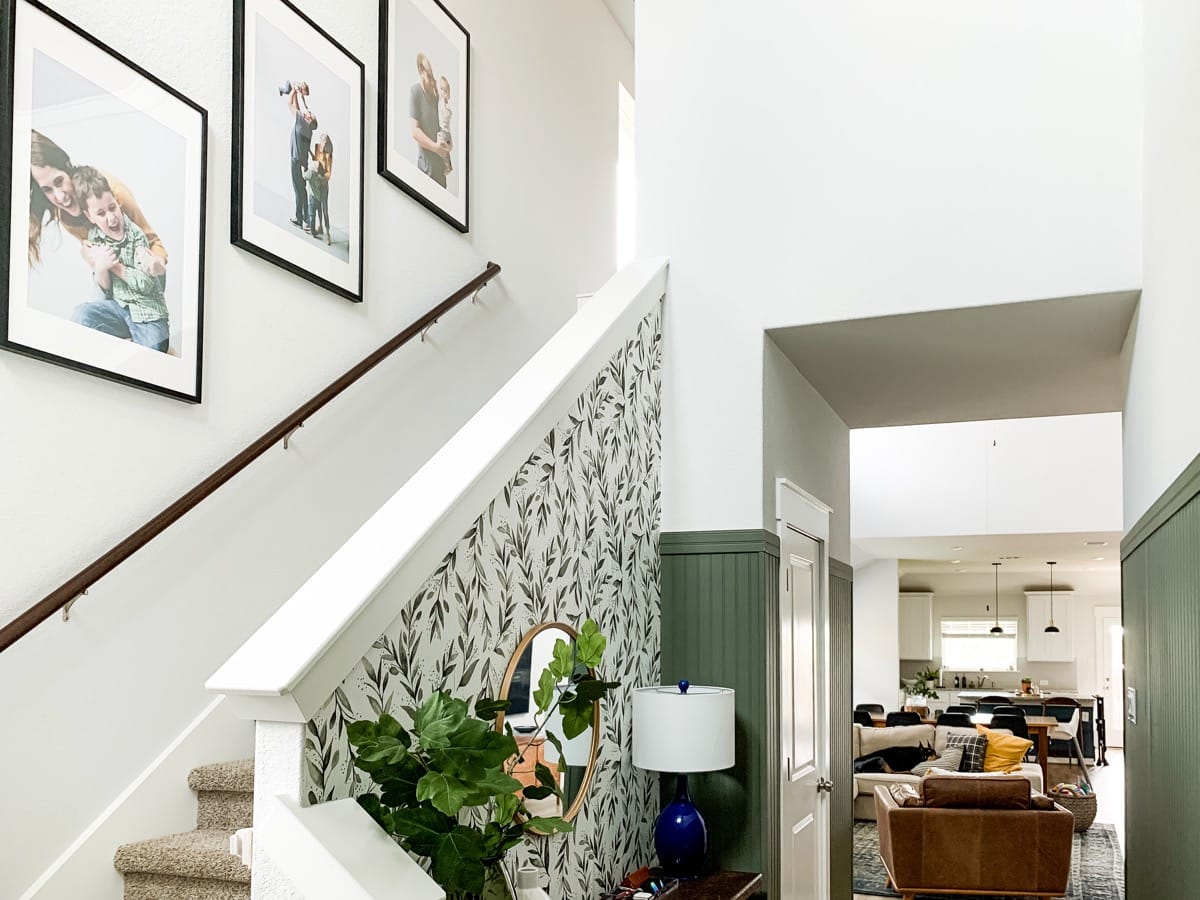
I’ve been working on our entryway and I completed one more project last week! Check out the details of how I hung some large-scale family photos going up our stairs.
I’ve been working on our entryway for a while now and with every little project I complete I fall in love a little bit more. I’ve never lived in a home with an actual entryway before, and even though mine is small I’m really trying to make the most of it and truly turn it into a welcoming space in our home.
If you aren’t all caught up yet, here’s what you may have missed:
- I added a wallpaper accent wall
- Then, I filled our staircase nook with some functional (and beautiful) furniture.
- I shared the plans for the rest of the space here…
- …and then I added some moody, tall beadboard around the room for some drama
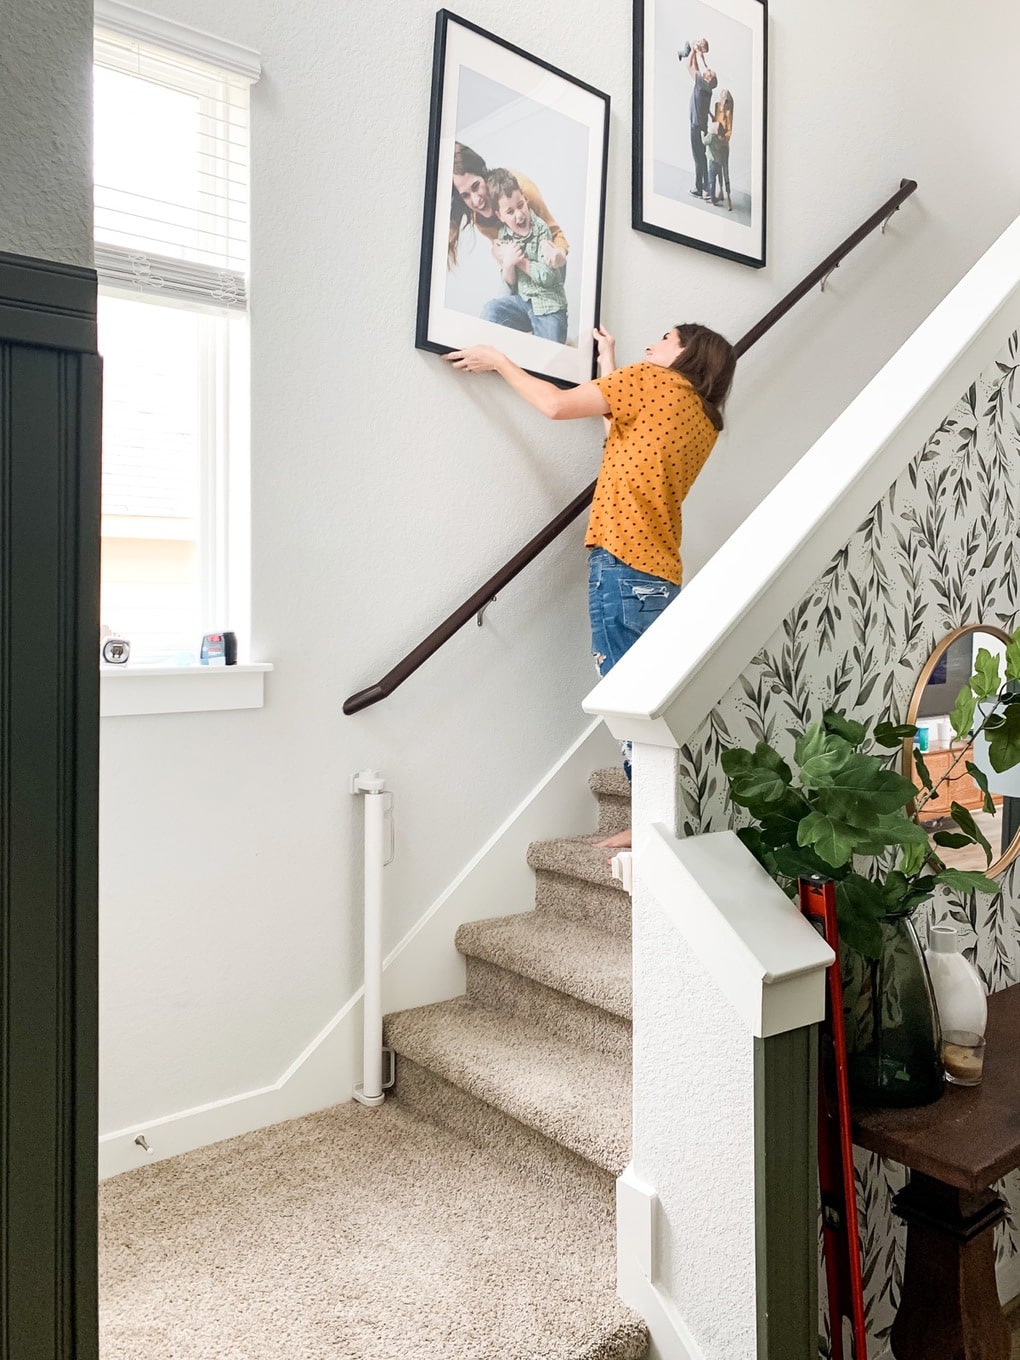
And today, I’m sharing how I hung some large-scale family photos going up our staircase. This is one of the very first things I’ve hung in our house and they make me so happy.
I thought this project would be really straightforward, but it turns out that hanging photos going up a staircase is just a little bit more complicated than your average picture-hanging venture. Getting things centered, level, and evenly spaced can be tricky, so I wanted to share what Corey and I learned as we worked!
This post contains affiliate links. Click here to read my full disclosure policy.
How to hang pictures in a staircase
First of all, let’s chat materials.
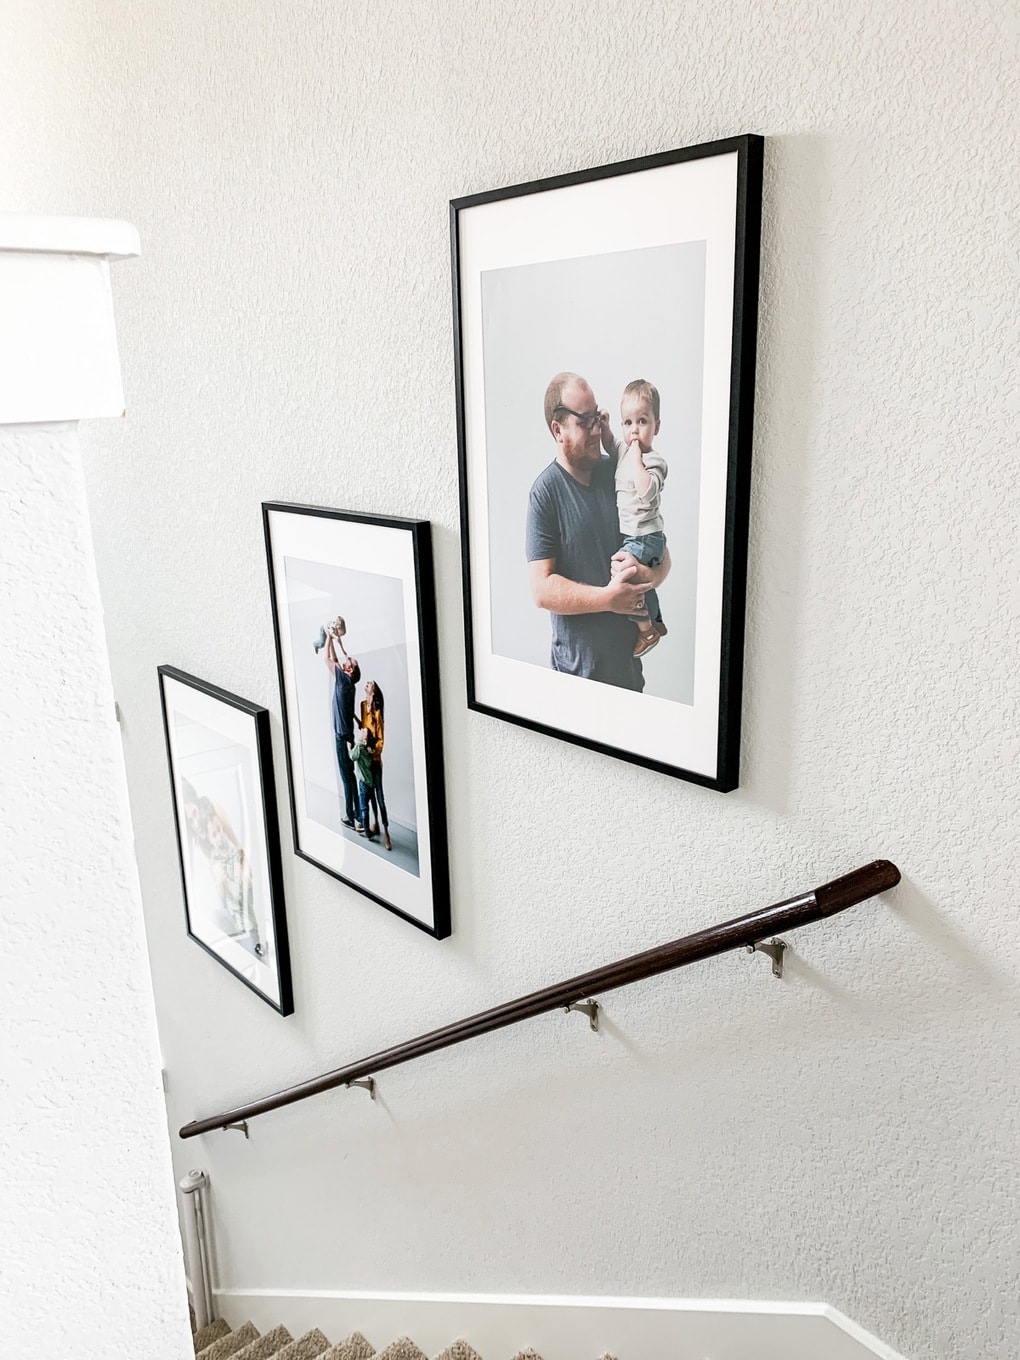
I chose these huge, 24″X35.75″, RIBBA frames from IKEA to hang our family photos – I wanted something really large but I didn’t want to spend a fortune. These are just $20 each and they have plexiglass instead of actual glass which means I don’t need to stress about the kids knocking them off the wall (because I have two boys and we all know that’s gonna happen eventually, right?!).
For the photos, I had them printed in a 20X30 poster size from Walmart in a matte finish. I had several people warn me that the printing quality at Walmart isn’t great, but I was honestly really pleased with how they turned out! Granted, our photos aren’t super detailed like a landscape and don’t have many vibrant colors, but I would 100% use Walmart again for a large print – especially at that price!
For hanging the frames, you’ll need 3″ screws – the hanging mechanism on the RIBBA frames sits really far back, so you’ll need to make sure you have a screw that’s long enough to reach it while still being in the wall! If you want to be extra careful you can use some wall anchors, but I just hung them on screws because the frame is pretty light. They’re holding up great so far!
start by hanging the middle frame
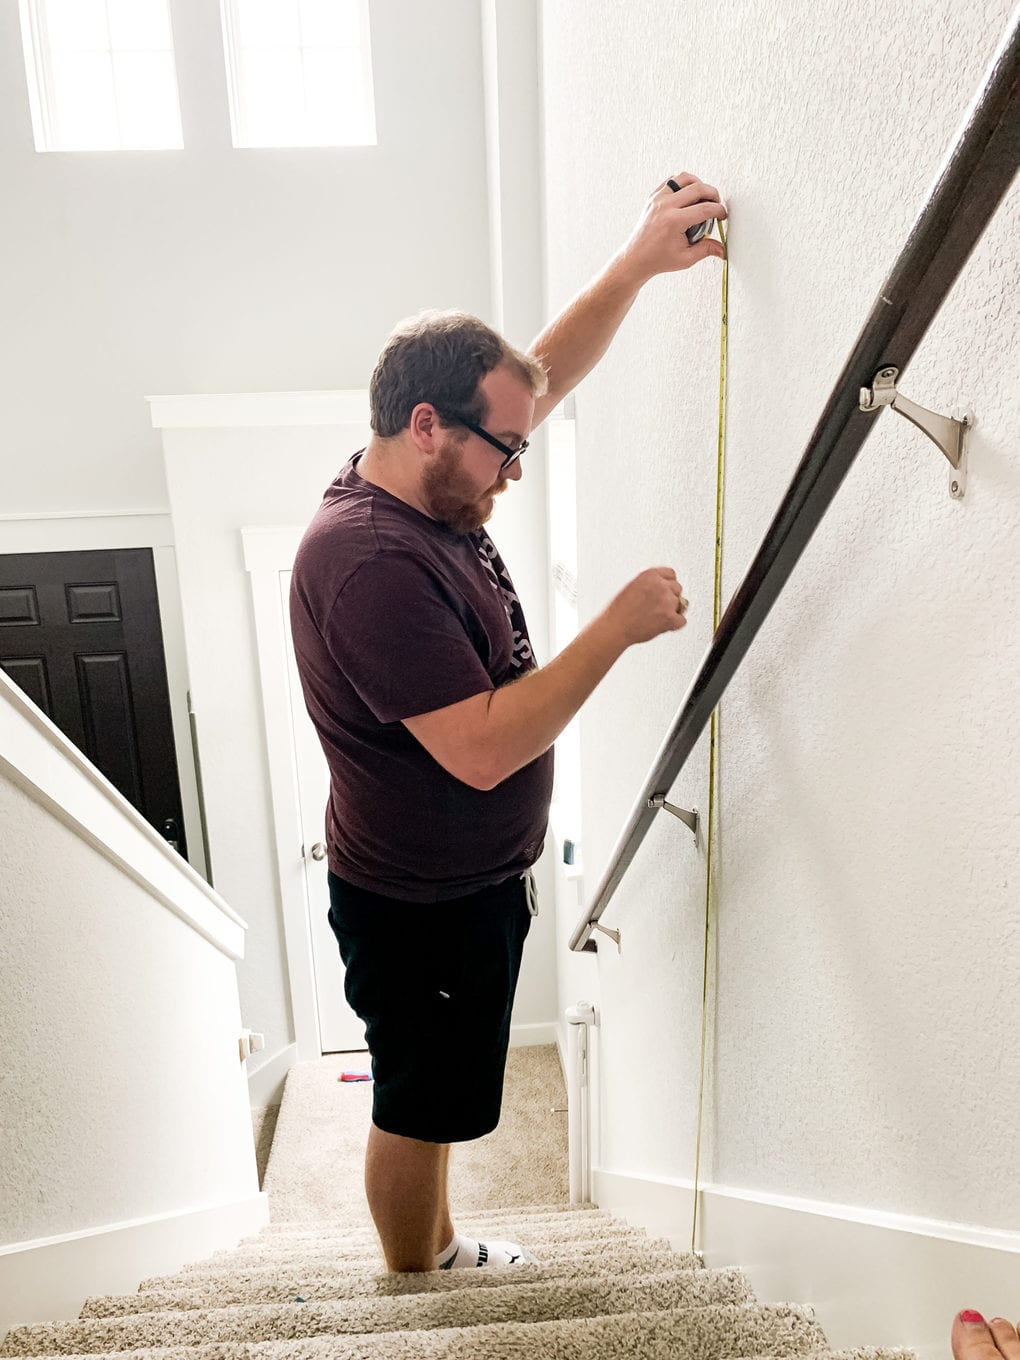
Your first step is to hang the middle frame. We found the center of the stairwell by measuring the handrail (on a diagonal – it works since you’re also hanging the photos along a diagonal line) and finding the middle of it.
Once you know where the middle of your stairs are, determine the height for the bottom of the frames.
The “standard” height for the bottom of the frames going up stairs is about 4 feet off the stair. We held ours up and played around with it – we liked ours a little above 4 feet – right at 52″ – but there’s no right or wrong answer here!
Make a small mark on your wall with a pencil where you want the bottom of the middle frame to be – it should be in the middle of your handrail, and at your desired height from the stair.
Now, you’re ready to mark for the screw. Measure how far it is from the bottom of your frame to the hanging mechanism on the frame. Then, measure that distance from the mark you’ve already made on that wall, and that’s where your screw should go!
Use a drill or screwdriver to insert your first screw in the wall, making sure to leave it sticking out far enough to reach the hanger on the frame (remember, you’ll need long screws!).
Then, hang up that first picture and pat yourself on the back!
**A note: This will vary depending on the layout of your stairs BUT I think it’s important to note that we hung our photos following this method and when we stepped back they looked off-center. We measured and re-measured and they WERE centered, but thanks to an optical illusion and aaaaall the angles, they appeared to be cheated towards the top of the stairs.
We chose to move our photos about 3″ toward the bottom of the stairs to make them appear to be centered. They look much better now, even though we know they aren’t actually centered. Don’t be afraid to play around with this if you run into a similar issue!
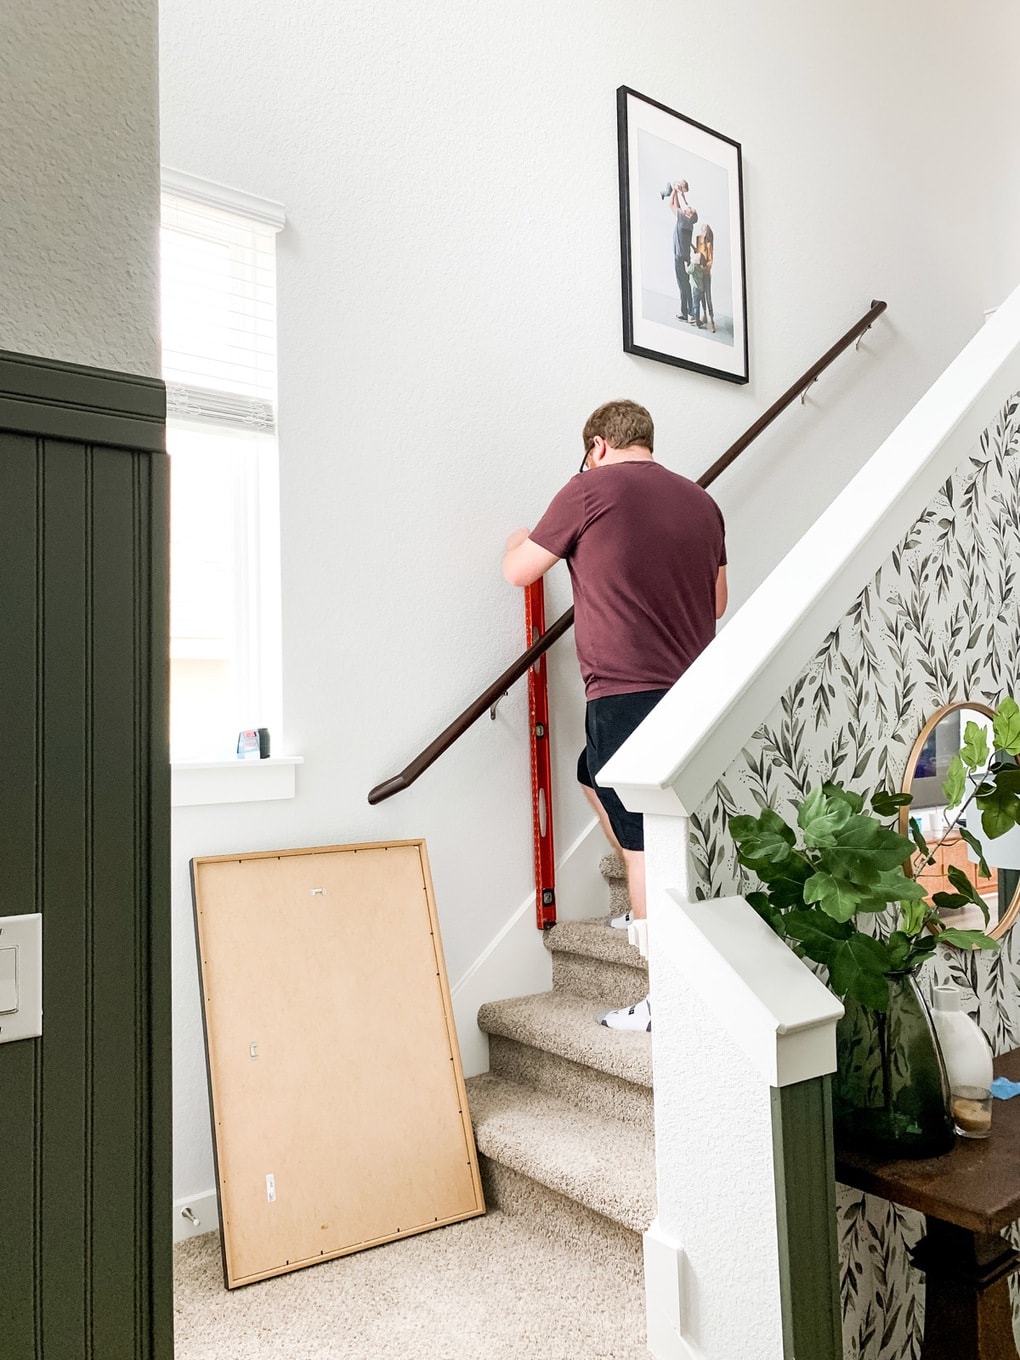
Hang your other frames
Once you’ve got the middle one hung, the hard part is over!
Have a helper hold up the next frame to see where exactly you want to place it. We eyeballed this, but we spaced our frames approximately 4″ apart from one another. Don’t worry so much about measuring it out for the first one – just pick something that looks good and go for it.
When we got to this part (and this will sound silly but it worked!), we used the stairs themselves to make measuring easier. We determined that the center of the frame needed to line up with the edge of the third stair from the middle (and the first frame had been hung to line up with the middle stair!), so we grabbed our long level, placed it on the edge of the stair, and used that to make our mark.
It’s not the most professional technique, but it got the job done!
Once you’ve found the right spot for the next frame, measure the height again (for us, it was 52″ plus the distance from the bottom of the frame to the hanger), make your mark, and add your screw!
Do the same thing on the other side – for example, if you centered the second frame on the third stair from the middle, then count three stairs from the middle going the other way to center the third one on.
Again, not the most technologically advanced method, but it was quick and easy!
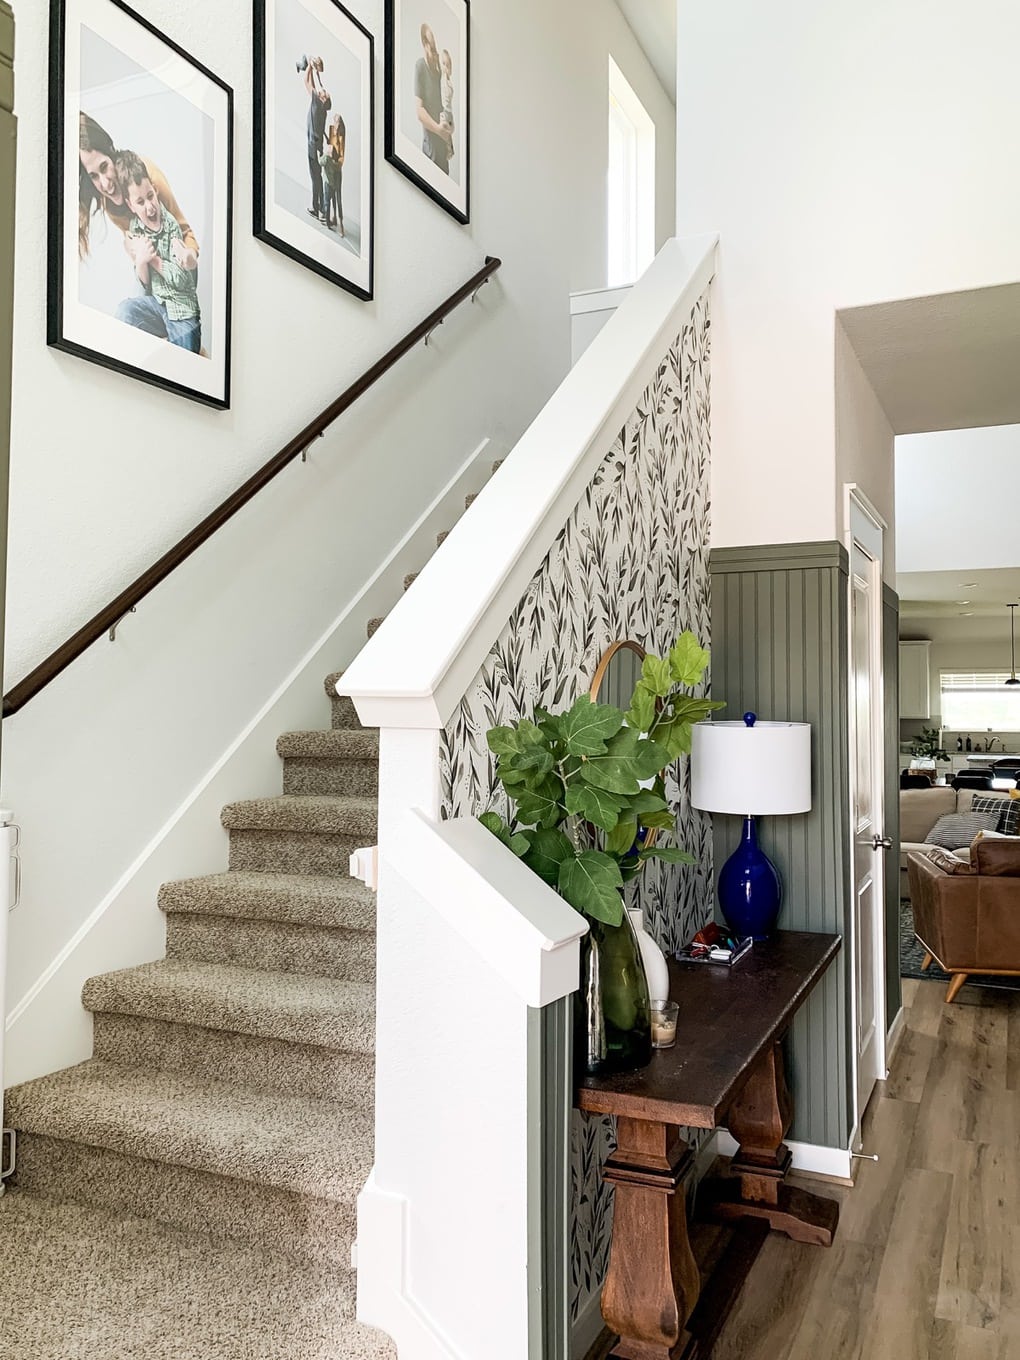

And that’s that!
I love love love how this turned out and I’m so glad to finally have some family photos up on our walls.
I had considered adding a runner to the entry next (and many of you agreed with me!) buuuut now that this is up I’m thinking it might make the space feel too visually cluttered. I think maybe it’s time to stop.
What do you think?!
I’ve got some front door paint on the way to my door (hah!), so I’m hoping that by next week I’ll be ready to share the last few steps in this little entry refresh with you!
The post How to Hang Photos on Your Staircase appeared first on Love & Renovations.